Questions? Comments? Suggestions or Ideas? Contact me at:
cynspiration [at] gmail [dot] com

Wednesday, July 28, 2010

Fun with Felt!


Have you ever played around with felt? I use it for all sorts of fun crafts and right now I am working on a felt playhouse. I will be documenting as I go, but the finished product will be a castle. Of course, castles need scrolls and what better way to tie them than with ribbon?

You will need:
One piece of felt, I chose white. Cut into two equal pieces cutting straight down the long side. 
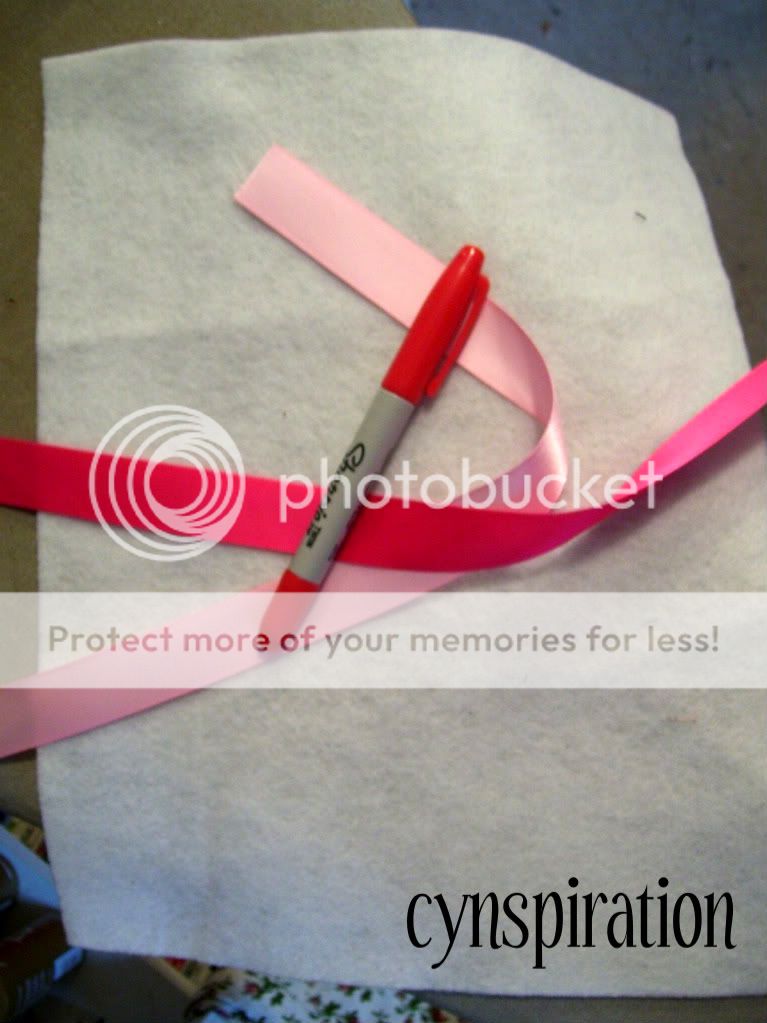
2 peices of ribbon about 12 inches long
and a fabric marker or sharpie
Photobucket
 Pin your ribbon to the backside of your felt. I pinned the middle of the length of ribbon down in the middle of the felt, but in the future will pin down mid-ribbon near one edge.
Photobucket
Stitch a rectangle
Photobucket
Write your letter on the right side of your felt. I didn't like how the Sharpie wrote, and will be trying a fabric marker next time.
Photobucket
Finish it off by tying the two ends of the ribbon together and you are DONE!
Photobucket
Fun and simple right? I am so excited to work more on this playhouse. I think the finished product will be wonderful!

Wednesday, July 21, 2010

Taggie Monster

Photobucket
Look at this little guy! Too Cute right?  I found the idea over here at Craft Schmaft.  You can download a free pattern there. I just wanted to highlight a few changes that I made to make it suit me and my needs better.

I started out by tracing the pattern and making the legs part of the pattern, so the whole monster would be two pieces. ***NOTE: Make sure you add a seam allowance when you trace the pattern. I didn't the first time I tried and the result was disastrous! I added half an inch.
Photobucket

Photobucket
I was also worried that when I washed this little guy, which is an eventuality in my house, all the ribbon would fray and I would be left with really long strings wrapped around in my washing machine. Can you imagine that nightmare?  I decided to enclose all the edges of the ribbon. I just cut a rectangle that was wider than my monster's middle. I hemmed the top and bottom, then sewed on the ribbon.
Photobucket
Fold the top of your fabric over and sew another seam...
Photobucket
Open it up and sew another seam to hold it open and repeat until you have several rows with all the ribbon edges enclosed.
Photobucket

Photobucket
I sewed it onto the top piece of my Monster, then pinned all the ribbon towards the middle. Right sides together, sew the top and bottom piece together leaving an opening between the legs. Turn right side out, it helped to use a pencil and turn the legs into the middle before trying to turn the rest.

Stuff and close up between the legs by hand.  I used felt to make the face and hand stitched the eyes and mouth on.  I liked the look better than the original tutorial shows.
Photobucket
Of course, having three little boys who each needed their own Monster, I have now made several. One for each of them. I had to distinguish whose was whose, and so I stitched an initial into the backside.
Photobucket
Credit to Claire at Craft Schmaft.  I hope you like what I did with your pattern! I know my boys loved it!

*Note: Please forgive the blurring on some of the pictures. My camera is on it's last legs.

Monday, July 19, 2010

Halloween 2010 Part 1

Halloween you say? Yes, that's right.  A bit early I know, but with three boys to please (and a Husband who expects me to sew the moon for them) I like HAVE to start early.  Gone are the days the boys in this house would accept something from the store-last year I surely ruined that-but it was worth it. The joy on my boys faces when they got to have the costume they wanted was worth the hours of sewing while 38 weeks pregnant.  But really, the reason to continue is a selfish one.  I enjoyed myself, I really had a good time.

The first step is to know your SUBJECT.  This should be the easiest part. In all probability you are making a costume for you or your child.  

The second step is to FIND THE CHARACTER. This one may take some guiding or you too may end up trying to make a Bowser costume.  Also, keep in mind the weather your area experiences when designing the costume.  For me, it means thermals under fleece.

Third- Use GOOGLE IMAGE SEARCH and get in your head an idea of what you want the finished project to look like.  Remember though, that as you go things may change and your initial vision may be different. Last year I made a lot of changes to my plan before I was ready to start in with fabric.

Four- Find a pattern as close to possible to your vision and then alter it to meet your needs.  OR if you are daring, you can make your own pattern. But we'll have to learn that one together, I haven't tackled that yet.  

My initial images last year were far from the finished product, but all the time and effort made all the difference.  
Meet Bowser: 
Photobucket


And Mario with more of Bowser from behind:
Photobucket
I am a sucker for themed costumes, so when my oldest wanted to be Bowser(and would not be swayed), it seemed natural to convince his younger brother to be Mario.

This year, the boys want to go as Sonic and Knuckles from Sonic the Hedgehog. I think I may have to do some serious pattern creating to pull this one off.  But what should boy number 3 be? I don't know how to tie him into the theme or if I should. He will be just shy of his 1st birthday.

**Start Brainstorming so we can build our costumes together! 


** I am really hoping to have a Halloween Picture Parade of past costumes you all have made.  If you would like to participate, please email your submissions to me at cynspiration[at]gmail[dot]com.

Saturday, July 17, 2010

The Hobo Sack

Have you even been over to MADE?  Dana has some great stuff and provides easy to follow Tutorials.

My Best friend growing up just had her third baby, a little boy to join her two beautiful daughters.  And I wanted to send a very personal gift.  But I also know young kids who have had their world turned upside down with the addition of a sibling. (Yep, I did it recently, in Nov '09). I wanted to give her girls something to make them feel involved and special. I decided to make them their own cinch sack, but to save myself the time of figuring the measurements and trial and error, I headed right over to see what Dana had done.
Here is my bag:
Photobucket

Her original tutorial can be found here.

There were only a few changes that I made.

I wanted the cinch ties to be straps so it could be worn like a backpack.  So I added twelve inches in length to each one. I also made small tabs that hold a D ring, which I sewed into the seam of the outside (right sides together) close to the bottom.

Photobucket


I also added a vinyl name/emergency contact card holder into the lining. I did this before any bag assembly took place, just make sure that it is on the RIGHT side of your lining.
Photobucket


Dana did a great job with this one!