Questions? Comments? Suggestions or Ideas? Contact me at:
cynspiration [at] gmail [dot] com
Showing posts with label Crafts. Show all posts

Wednesday, February 16, 2011

Valentine's Day Shirt Recap!

Photobucket
Remember when I posted  here about making the boys Vday shirts? I thought I would share the boys in all their masculine Valentine's shirt glory!
PhotobucketPhotobucket

I also posted about a little girl shirt I was making for a friend. I turned out great and the little R wore it so well, she looked wonderful in it! The finished front-
Photobucket

The finished back, and an up close of the little bird that covered my mistake.
PhotobucketPhotobucket

I really loved how easy these shirts came together, and I loved watching the boys wear them. 
***************
By the way, I am feeling pretty stoked right now considering I fixed my computer all by myself...finally. The issues seemed to never go away, but after spending two entire days working with it, the issues are resolved and the whole computer is updated. To reward myself, I bought me a Silhouette SD! Woot! I can't wait to get busy with it!

I also have a post in the works from J's birthday party. He looked a stud in his race car shirt and the cake was so fun to make. Check back for it!

Thursday, February 3, 2011

Valentines day Shirts

Photobucket
Valentines Day is just around the corner, and it is a FAVORITE holiday around here. My Husband is a romantic and takes any chance he can get to be romantic. I decided the boys need to be Festive on this favorite day as well. Festive, but manly which can be tough to do for Valentines, with all the pink, lace, and hearts around. But I think we managed it. I picked out some sayings that I liked, that were lovey, but not over the top or feminine. The shirts are simple, but I love the way they turned out.

I bought the shirts at Walmart and they are just plain long sleeve tees. I used fabric paint and freezer paper to put my sayings on. Ready to do yours?

I printed off the computer the text I wanted, and then traced it on to freezer paper, with the shiny side down. I don't have a fancy craft cutting machine(despite my best efforts), so I get to do it by hand.
Photobucket
I get to cut it all out by hand too. And that fact essentially changed my plans. I wanted the back of the shirt to say "since 2009" for each of the kids with the year they were born. So it would say, "LOVED, since 2009" But I wanted the back lettering to be small and there was NO WAY I was going to try and cut it out with scissors. 
Photobucket
Position the freezer paper on to your pre-washed shirt with the sticky side down, and iron with no steam. This will seal the freezer paper to your shirt so the paint doesn't run.
Photobucket
Apply one coat of paint at a time, and allow to dry before giving a second coat. The black paint only needed one coat, but the white needed more. See my mistake at the top? I'll show you how I fixed that in a minute.
Photobucket
Once yourpaint is dry, remove the freezer paper. It peels up really easy, just take it slow.
Photobucket
Put a plain press cloth over your painted graphic, and iron again to seal the paint. Then You are Done! The shirt is ready to go and the best part is they are easy, fun, and look great!
Photobucket


Okay, remember my mistake? Some paint dripped right of my brush onto my shirt. I am making this one for a friend's little girl, who happens to be named Robin. I found a very plain image of a robin, shrunk it way down, traced and cut it out, ironed it down and once painted will effectively hide my mistake while looking totally intentional and awesome. Pictures of the finished shirt will be coming in the next few days along with a shot of H wearing his apron and chef hat that I made for Christmas.
Photobucket

Tuesday, December 7, 2010

Golf Ball Christmas Tree

Did you get a chance to enter the giveaway for a Treat Bag and Bottle Cover? Enter here!
*******************

I need to brag for a second. I married a wonderful man, who is very supportive of my desire to have this blog. He also has plenty of ideas for me and this time, HE wanted to be the one manning the project. I, of course, was whole-heartedly behind him.

Photobucket

We live near a very nice Nature Park, and it butts right up with a golf course. When the snow melts, the men of the house go almost daily and collect the golf balls the winter has saved up. This results in a large bag of golf balls that we have had for quite some time, being that neither myself or my husband golf. The Mr decided to give some of them up to make a fun Christmas Tree decoration.

Supplies:
A LOT of old Golf Balls
foam Tree
Hot Glue
Spray paint
beads or buttons for decorations
base

Mr started by commandeering an old Paint can lid. Trim the foam tree if necessary and secure to the base. Glue the balls to the base and the tree wrapping around the foam tree. Continue gluing balls around the tree.

Photobucket


Photobucket

When the glue has set, head outside and spray paint the tree with Green paint. Mr intentionally left the top ball off, so that he could use a yellow golf ball as the 'star.'

Allow paint to dry and re-coat if necessary.

Photobucket

Glue adornments, buttons or beads, and string an extra set of small Christmas lights around your tree. OR if you prefer a different look. Simply spray paint green and top with fake snow. I was pleasantly surprised with how well I liked the end result, and the kids loved helping!

Photobucket

Does your husband like helping you craft? I had a lot of fun watching all the guys in my family bond while making this tree, which is exactly what we should be doing during this season of the year.

Wednesday, December 1, 2010

Christmas Calendar

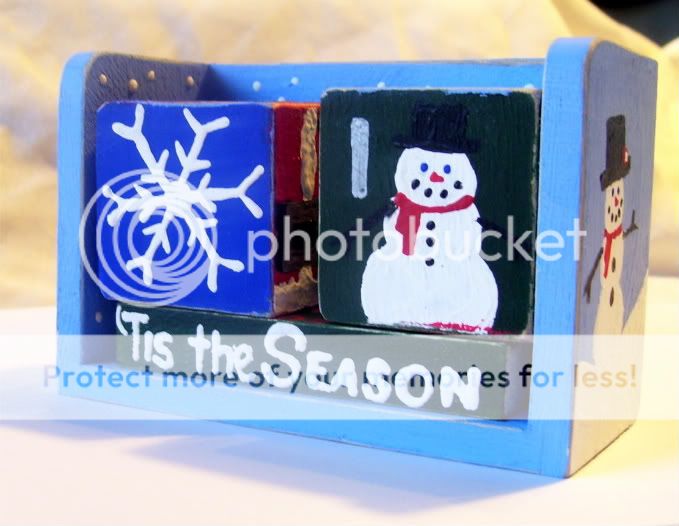
It is the first day of December, and so time to make a December Calendar. See the one I made? 
Photobucket
I found a great little Perpetual Calendar Kit at my Local Craft Store for $3.99! What a great price, and so I scrapped the other ideas I had in favor of a December Calendar that is fully customizable. 
Photobucket
I wanted lots of little sayings to chose between, so that as the days go along, my Calendar isn't ever the same twice. My favorites by far though are the shopping ones. 
Photobucket
I wanted the dates to have fun little pictures on each block so the boys would have fun looking at them. I love the Santa Hat and Belly.
**NOTE: Block one should be numbered 0-5 and block two should have the numbers 0, 1, 2, 7, 8, and interchangeable 6/9.
Photobucket
I wanted to decorate the outside, and so adorned each side with a Snowman, and the back with a Snowy landscape and a tree. (not pictured...the picture is gone...I can't find it...)
Photobucket
I did all the painting by hand with no stencils (see how brave I was? But I wanted that homemade feeling) and when all the paint was dry I used some sand paper and sanded each edge and corner.

Photobucket
I have a lot of great posts coming before Christmas, including some simple gift ideas that should come together quickly! AND I plan to giveaway some of the things I'll be making, so keep coming back and tell your friends! Let's see if we can get a nice little group going and among them some lucky winners! 

Also, you can find me on Facebook and never miss an update! Like us here!

Tuesday, October 19, 2010

Felt Playhouse-Castle Style

Hello! Back again, it seems harder to craft and then blog than I had anticipated. How do you find the time to get your crafting in? It seems particularly hard for me because the MR. has requested that I not do after hours crafting. (He is probably right considering I am GROUCHY if I stay up too late. Morning comes early with multiple wakings and kids.) At any rate, I am trying to do it with three kids running around all day and it isn't very effective! 

I also finished and shipped the second Bowser costume! Wow, it still took a lot of time, and I made some great hair this year so the costume was even improved a little! And then a breathed a sigh of relief and began tackling my owns kids costumes, way behind schedule. But they are coming along. 

*************

On to what you want to see! I posted a while back about a felt playhouse that was in the works. I joined a 1st birthday exchange and felt the need to make something great! (MR thinks I went overboard, but a little girls joy is SO worth it-right?)  So here are the pictures of the castle I made for a sweet little girl. The only thing I would change is I would have done the battlements differently. See how they won't stand straight? I double layered the felt and used pipe cleaners for some 'bones' in between the layers, but the stability I was looking for isn't there. Next time (if there ever is one) I would use a real strong interfacing-the kind used for hat brims- and put that in between the layers and I would not sew it onto the fort as shown here. I would put Velcro all the way around the playhouse and attach the battlements as a second piece.

Photobucket

Photobucket
The Ivy wall
Photobucket
With flowers (attached with Velcro)
Photobucket
The friendly dragon ( I copied a clip art image and had my Dad draw it to scale.)
Photobucket
Window Wall with shape matching on the bottom.
Photobucket
Crown, torches, and mail
Photobucket
Weather pieces so She can match the weather outside.
Photobucket
Notice how the 'Drawbridge" door stays connected at the bottom? I put small grommets into the door and the 'door frame' and then used a key ring to run through both layers giving the Drawbridge effect I was looking for.

So, what do you think? I got the original idea for a Felt Playhouse from Jill at Homemade by Jill.

Wednesday, July 28, 2010

Fun with Felt!


Have you ever played around with felt? I use it for all sorts of fun crafts and right now I am working on a felt playhouse. I will be documenting as I go, but the finished product will be a castle. Of course, castles need scrolls and what better way to tie them than with ribbon?

You will need:
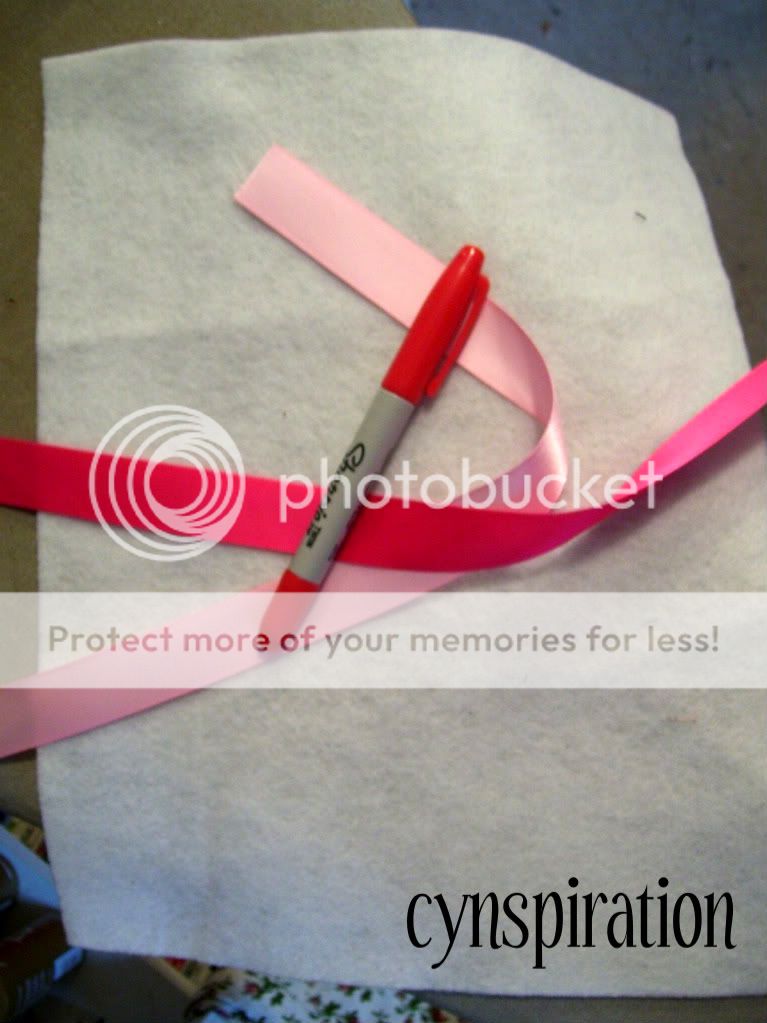
One piece of felt, I chose white. Cut into two equal pieces cutting straight down the long side. 
2 peices of ribbon about 12 inches long
and a fabric marker or sharpie
Photobucket
 Pin your ribbon to the backside of your felt. I pinned the middle of the length of ribbon down in the middle of the felt, but in the future will pin down mid-ribbon near one edge.
Photobucket
Stitch a rectangle
Photobucket
Write your letter on the right side of your felt. I didn't like how the Sharpie wrote, and will be trying a fabric marker next time.
Photobucket
Finish it off by tying the two ends of the ribbon together and you are DONE!
Photobucket
Fun and simple right? I am so excited to work more on this playhouse. I think the finished product will be wonderful!

Wednesday, July 21, 2010

Taggie Monster

Photobucket
Look at this little guy! Too Cute right?  I found the idea over here at Craft Schmaft.  You can download a free pattern there. I just wanted to highlight a few changes that I made to make it suit me and my needs better.

I started out by tracing the pattern and making the legs part of the pattern, so the whole monster would be two pieces. ***NOTE: Make sure you add a seam allowance when you trace the pattern. I didn't the first time I tried and the result was disastrous! I added half an inch.
Photobucket

Photobucket
I was also worried that when I washed this little guy, which is an eventuality in my house, all the ribbon would fray and I would be left with really long strings wrapped around in my washing machine. Can you imagine that nightmare?  I decided to enclose all the edges of the ribbon. I just cut a rectangle that was wider than my monster's middle. I hemmed the top and bottom, then sewed on the ribbon.
Photobucket
Fold the top of your fabric over and sew another seam...
Photobucket
Open it up and sew another seam to hold it open and repeat until you have several rows with all the ribbon edges enclosed.
Photobucket

Photobucket
I sewed it onto the top piece of my Monster, then pinned all the ribbon towards the middle. Right sides together, sew the top and bottom piece together leaving an opening between the legs. Turn right side out, it helped to use a pencil and turn the legs into the middle before trying to turn the rest.

Stuff and close up between the legs by hand.  I used felt to make the face and hand stitched the eyes and mouth on.  I liked the look better than the original tutorial shows.
Photobucket
Of course, having three little boys who each needed their own Monster, I have now made several. One for each of them. I had to distinguish whose was whose, and so I stitched an initial into the backside.
Photobucket
Credit to Claire at Craft Schmaft.  I hope you like what I did with your pattern! I know my boys loved it!

*Note: Please forgive the blurring on some of the pictures. My camera is on it's last legs.