Questions? Comments? Suggestions or Ideas? Contact me at:
cynspiration [at] gmail [dot] com
Showing posts with label kids. Show all posts

Friday, February 4, 2011

Apron Model

Remember the Aprons and Chef Hats I made for Christmas for J and H? J was happy for the apron but has REFUSED to put the chef hat on. H on the other hand, behaves as if they were the greatest gift ever! He asks to wear them all the time, whether he is eating or helping cook. I can't resist his charm!

Photobucket

Doesn't this face make you smile? Can you see the food on his face? This was the post cooking picture and he did not want to wash his face first.  All his personality shining through this photo makes me so happy, I can hardly contain myself. So, what do you think? 

Photobucket

Wednesday, December 22, 2010

CHEF HAT!!

Remember yesterday when I showed you how to make an apron? Today we are learning to make the matching Chef Hat! I am so excited to see the boys in these, I think I am going to plan all sorts of meals for them to help me with.
CHEF HAT
Photobucket

You will need to measure your little guys head. J's head is 19" around. I am using elastic so I added three inches to the length. Cut one rectangle 22" by 6".

Start by making a circle pattern on freezer paper. I did mine by tracing a really big Tupperware lid and adding an inch all the way around-I was lucky I had a bowl big enough. I have also used two pens attached to a string to make a circle. Good Luck! 

Now the difficult part. The circumference of your circle (distance around the outside) should be the head size plus 3" (22). This is the math part-I apologize for this. 

To get the right circle size, first find the diameter (distance across) of your smaller circle. The formula is d=c/3.14. In my case,  d=22 / 3.14. d = 7.  I added my 8" for height. The diameter of the circle I need is 15"

I then drew my circle, folded it in half, and cut it in half along the fold.
Photobucket
Place your half circle on your fabric on the fold. I did not use the fold from the bolt, but made my own fold closer to the selvage edge. I did this to make the fabric more usable, and I didn't want a huge hole in the middle. 
Photobucket
Now you should have one large rectangle (pictured folded) and one large circle. 
Photobucket
For the band, fold your rectangle in half matching 6" sides, and sew with a half inch seam allowance. 
Photobucket
Press the seam open.
Photobucket
Fold the band in half, matching the seams and raw edges, with right sides out.
Photobucket
Pin 3" away on either side of the seam to make a casing for the elastic. ***NOTE: When sewing and pinning, only get the back side of your band-it should still open like a circle! The pins should secure the wrong sides of the back of the band.
Photobucket
1.5" up from the bottom edge, sew a line parallel to the bottom edge. You now have a casing for elastic. 
Photobucket
Cut a 3" piece of 1" elastic. Using a safety pin, thread your elastic through the casing. Stop when your elastic is pulled to the edge of the seam. 
Photobucket
Pin your elastic, and use a zigzag stitch to secure it down. Continue pulling the elastic through the casing, and secure it the same way.
Photobucket
It will gather nicely for you and should look like this.
Photobucket
Now get your circle and use a basting stitch to gather. To gather, run a very long stitch around the whole circle, DO NOT BACKSTITCH. 
Photobucket
Hold the top thread tightly and pull the bobbing thread, this will cause your fabric to gather. Push your gathers back and continue until your circle now has a gathered edge that is rougly 19" -or the circumference of your little guys head.
Photobucket
See what the gathers look like? The sides of the circle will now stand up.
Photobucket
Pin the circle inside the hat band matching raw edges. Sew together making sure to sew towards the inside of the hat from the gathered seam. This will ensure that your gather seam is hidden. I like to serge the edges here, if you don't have access to a serger, use a zig zag seam close to the raw edges to prevent fraying. 
Photobucket
Viola! A Chef Hat!
Photobucket
Doesn't it look great? I am in LOVE with these aprons and think I may have to whip one up for the MR! He needs to match too, and considering he enjoys cooking and I endure it, it sounds like a plan to me!

What do you think? Do you have apron and chef hat making in your fute

Tuesday, December 21, 2010

LITTLE BOY APRONS!

My Little boys LOVE helping in the kitchen, and I have spent a considerable amount of time trying to wrap am adult sized apron around their little bodies. On Christmas Morning they will be opening  a custom fit apron and chef hat. I can't wait to see how they like it! 

CUSTOM FIT APRON
Photobucket
The first step is measuring your child. The measurements you will need are:
Length from just bellow center collar bone to just below knee. Mine: 22"
Length from center collar bone to waist. Mine: 7"
Length across chest at armpit level. Mine: 7"
Waist. Mine: 14"
Length starting at armpit level on one side, around neck, and to armpit on other side. Mine: 16"

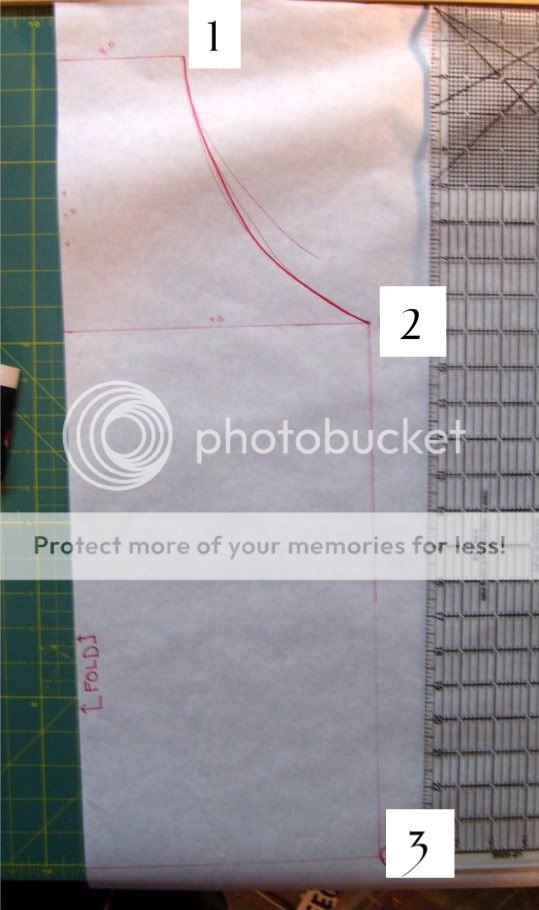
Drawing your own pattern. Use Freezer paper and a ruler to draw your pattern. 
Photobucket


(1)At the top make a line that is half your chest across length. My line is 3.5".

(2)Using your ruler, draw your second line 7" down from the top line. Draw a parallel line that is half the waist length. My line is 7".

(3)Measure down from your top line the full length of the apron, in my case 22". Draw a third parallel line half the length of the waist. Another 7" line for me. 

Last connect line 1 to line 2 with a sloping line. This will be done free hand, just go slowly until you have the shape that you want.

Cut one on the fold of your fabric. I used a lightweight denim because I know these are for little boys and I wanted durability. Cutting on the fold ensures that both sides match.


Prepare your pocket. Cut a strip of fabric on the grain that is 22" by 6". Press in half matching 6" ends.
Photobucket
Sew around all three open sides, leaving a small opening for turning. This will leave all your edges enclosed in your pocket. Clip corners, turn and press.
Photobucket
Cut two 14" by 2.5" strips that will become the ties, and one 18" by 2.5". Sew all three into tubes with ends closed and a small opening to turn them on the length. Look at the bottom tube to see where I put mine. Backstitch at all start/stop points. 
Photobucket
Clip corners, turn right side out and press. Make sure to use a pencil and push the corners out so you have a nice clean corner. 
Photobucket
Instead of finishing all the edges by turning, and pressing twice. I put a binding around the entire edge. After binding I pinned one tie to each side at the waist point and top stitched down. I pinned the neck band to the top and top stitched there as well. Instead of binding you can use bias tape as well. Need help binding? I am going to send you to Ashley at MakeitLoveit for help. I do finish mine a little differently, but my pictures are blurry so my own tutorial will have to wait.

Pin your pocket onto the right side of your fabric. Make sure the opening you left is on the bottom so it will be sewn closed. Sew around three edges, leaving the top of the pocket open. I sewed right at the edge, and then another stitch 1/8" next to it. Then in the middle of your pocket, sew two seams to divide the pocket into two pockets. I sewed then 1/4" apart.
Photobucket
And that is it! I am so excited for the boys to open these! Along with some measuring spoons, wooden spoons, and a safety potato peeler. (utensils purchased at the dollar store!) 
Photobucket

Stop by tomorrow for the chef hat tutorial-You will be so happy to see how easy and fast it is!

Tuesday, December 14, 2010

Bean Bags!

Bean Bags are so much fun, and my boys LOVE them. So for Christmas this year I decided to make them their own set. I discovered, Bean Bags may be one of the easiest things to make ever. (I had a great picture taken of a nice pile of bean bags that will have to come later...I am on a borrowed computer right now, mine won't connect to the internet.) Let's Begin.
Photobucket
I cut 20 rectangles of fabric, each 7" by 4".
Photobucket
Because I didn't want to spend a long time pinning, I pressed each in half matching 4" sides.
Photobucket
Start on one side and sew around your square, leaving an opening for turning and filling. Make sure to backstitch at each start/stop point.
Photobucket
Clip your corners. 
Photobucket
Turn Right side out.
Photobucket
Fill with beans. (Aren't my dry red beans pretty?)
Photobucket
Hand stitch the opening closed.
Photobucket
And Viola, finished! Repeat 19 more times. 
Photobucket
I really had fun with this project, and am so excited to give them to my boys for Christmas, I almost dropped the ball yesterday. J came in while I was filling the bags, and asked me who they were for. "...the kids at church..." I answered. He believed me and then politely requested that I make him some. I asked what he would do with bean bags.
"Practice throwing them into things."

So, now that I have a nice quantity of bean bags, I need to make some containers. I'll let you know how they work out!

What are you doing for your Home made Holidays?

Friday, December 10, 2010

Child Scarves

Did you see the Giveaway Winner? go here to see who won.

Did you see Yesterday's post about Chunky Beaded Watches? The coupon code is good until tomorrow night! Go check out the post and then order yourself or a friend a kit with 10% off-that is a great deal! You can see the post here
**********************.

My Boys love scarves and are always trying to borrow mine. Of course, then they trip because a scarf that fits me is WAY too long for them. I set to work making them scarves and it may be the easiest project I have ever done. EVER. 

Photobucket
Photobucket
Please forgive the photo. I don't know what happened. I cut three strips of fleece(that I had leftover from Halloween-which makes this project FREE!) I cut them each 40 inches long by 6 inches wide. I used red and black, and then blue and black.
Photobucket
Line up the three pieces, I put the black in the middle, and sew one line right down the middle. I used a zig zag here, but on the blue one I used a straight stitch.
Photobucket
Cut the top two layers of the fleece into strips. My strips are each about an inch, but I just eyed it. Cut strips down both sides of your seam. Leave the bottom layer of fleece in tact. I left the bottom layer in tact so that cold air wouldn't blow in around the boys' necks. It gets really cold and windy here. I have seen a similar scarf with all the layers cut and while it is very cute, it provides little to no warmth.

*You can use more than 3 layers of fleece! Just leave the bottom layer intact, and cut the top layers into strips. The more layers, the more fluff! Have fun!
Photobucket
P.S. Like our Morning Faces and Bed Heads? We aren't the friendliest bunch in the AM. But it is the only time the kids are still enough to really get a photo. 

Monday, November 15, 2010

A Very Viking Birthday!

We call my third son Concobar. And he loves it. In fact, he is my only child to HAVE a nickname. No others stuck, and J is strongly opposed to nicknames. But the baby, he gets one. His Aunt refers to him as "Concobar the Barbarian!" and so for his first birthday theme, we ventured out of the Young ideas and went to Viking. He had a banner, a cake, and a GREAT costume.

Photobucket
I used a 3XL Hanes shirt from the Men's section at Walmart for his shirt and pants. Super easy(Tutorial is in the works!) The Vest I winged my way through with some fabric out of my Mom's left over pile and the belt was pieced together from the Hanes shirt. I love the bulky look of it! We had to put on the spats too, but instead of using Velcro, I used some Suede cord again to tie them on. I think it really completed the look. I then made a simple skull cap with a band  out of brown fleece(the vest was also lined with this) and added some stuffed horns. PERFECT!
Photobucket
Felt Banner attached to some Suede cord fund in the craft section at Walmart.
Photobucket
Fantastic Cake by Ashley from Ashley's Cakes by Design. Look her up if you are in her area!
Photobucket
I think the best part were the foam battle ax and mace!  He sure had a fun time picking on his brothers ATTACKING INVADERS!

*****************

Did you all see our Guest Spot last week? Check it out here!

Wednesday, July 28, 2010

Fun with Felt!


Have you ever played around with felt? I use it for all sorts of fun crafts and right now I am working on a felt playhouse. I will be documenting as I go, but the finished product will be a castle. Of course, castles need scrolls and what better way to tie them than with ribbon?

You will need:
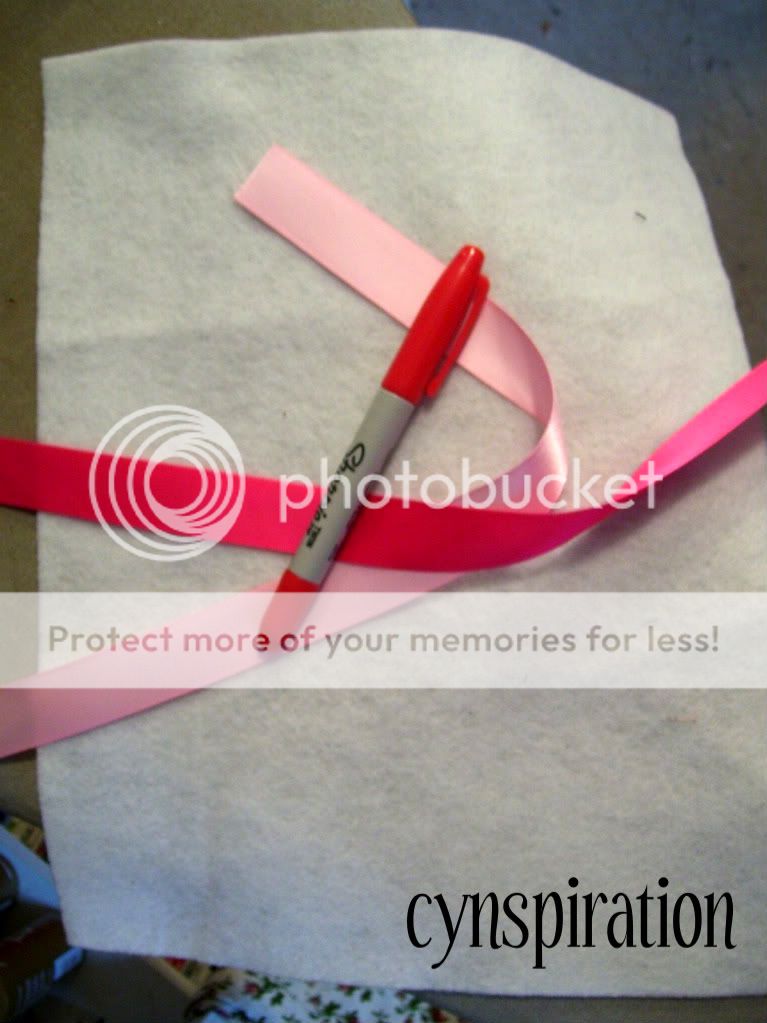
One piece of felt, I chose white. Cut into two equal pieces cutting straight down the long side. 
2 peices of ribbon about 12 inches long
and a fabric marker or sharpie
Photobucket
 Pin your ribbon to the backside of your felt. I pinned the middle of the length of ribbon down in the middle of the felt, but in the future will pin down mid-ribbon near one edge.
Photobucket
Stitch a rectangle
Photobucket
Write your letter on the right side of your felt. I didn't like how the Sharpie wrote, and will be trying a fabric marker next time.
Photobucket
Finish it off by tying the two ends of the ribbon together and you are DONE!
Photobucket
Fun and simple right? I am so excited to work more on this playhouse. I think the finished product will be wonderful!