Questions? Comments? Suggestions or Ideas? Contact me at:
cynspiration [at] gmail [dot] com

Monday, November 8, 2010

Sweatshirt to Child Pants Refashion!!!

Guest Post with a good friend of mine! Susie from FreeRose.etsy.com!  We first met on a message board because we both had little boys in Nov '09. I have loved getting to know her and I know you will LOVE what she has to share. Since we both have boys I am hopeful that she will have lots of ideas to share in my exploration of Crafting for little men.

*************************
I started sewing when I was 6 years old, my mom would sew every night and I would sit on the floor and watch her.  I started gathering scraps, and when she showed me how to sew by hand I made my first project-a belt for my older sister. I started sewing on a machine when I was 14 and things picked up from there!

Photobucket
I majored in Theatre in college, but mostly focused on Set Design even though I was working in the costume shop also during that time.  After graduating, I returned to my hometown and began costuming many local productions, as well as designing and supervising production for a regional theme park.  I also enjoy sewing fashion and accessory items, and now creating  for my child. 
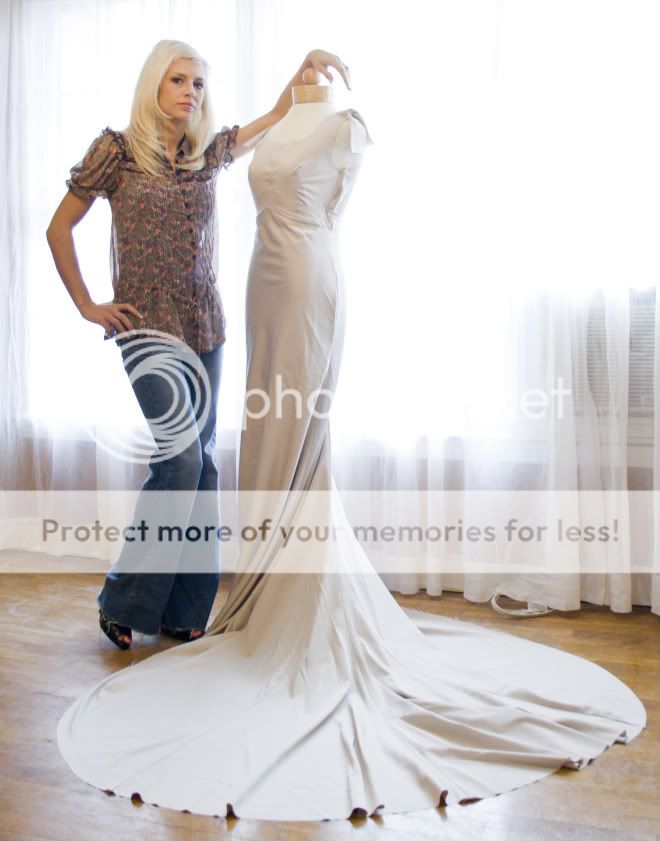
 I've always enjoyed trying to extend the life of things around the house, giving them a new use if possible.  While I was pregnant I decided my next commercial project would force me to commit to re-purposing something in every thing I made.  So, after my son's birth, I launched my etsy store Free Rose.  Everything I feature on there, from my cloth diapers, to handbags and fashion pieces, is hand made by myself and feature repurposed fabrics.  I enjoy working within those constraints because it really is a great challenge and is very fulfilling. ~Susie

**************************
Elastic Free Upcycled Sweater Pants by Free Rose
Supplies: One sweater, Stretchy pants that fit your child (to use as a pattern) Scissors, Pins, Thread, Sewing Machine, Serger if available 
These easy upcycled baby and toddler pants are made using the neck of a sweater as the waistband, eliminating the need for elastic and providing a comfy seam free waistband.  When choosing a sweater, measure your child’s waist and and find a sweater with a similar neck circumference.  The sweater pictured has a thick 2” band collar, a turtle neck would make for a cool fold-over waistband; I even made a cool button-fly pair using a button up, collared sweater! A close knit is also helpful so that it will not unravel while you work with it.  Any fiber content will do; I used 100% Wool so that mine could double as a cloth diaper cover. Here we go! 

freerose.etsy.com

Step 1: First, you will need to lay the sweater flat and inside out (right sides together).
Step 2: Then fold it in half with the front of the sweater to the inside, making sure it is flat and smooth.  Since a collar naturally dips to the front, we will be doing all of our measuring based off of the larger back seam. 

freerose.etsy.com
Now, fold your childs pants along the middle with the front to the inside, making sure they are smooth.  Below you can get an idea of where  we are going with the patterning.  Moving on to measuring and cutting...

freerose.etsy.com
Step 3: Measure the outseam of your child’s pants (this is the seam that runs from the hip to the ankle). Add 1” for a hem allowance.  Using a ruler and that measurment, you will want to measure from where the collar meets the shoulder, down into the side seam of the sweater. You will need to add a 1/2” seam allowance.  I used a cutting mat, clear ruler, and rotary cutter, so I could measure my outside and seam allowance at the same time, it makes things much faster, and keeps your sweater lying nice and flat while you finish patterning!   *I measured 18” from the bottom of the collar for my approx. size 18-24 M pair.

freerose.etsy.comfreerose.etsy.com

Cut along your out seam, this removes the sleeves from the sweater.  (Set them aside, you can make a second pair of pants from them too!) We are halfway done!

freerose.etsy.com
Step 4: Now, go back to your children’s pants, and measure the center back seam, from the center of the crotch (where all the pieces meet) to the base of the waist band in the back.  Return to the sweater, and mark that measurement-starting at the base of the collar (where it meets the body of the sweater), adding 1/2” for your sean allowance. *I measured 9 1/2” for mine. 

freerose.etsy.com
Step 5: For the next step, you’ll need to lay your child’s pants over the sweater, matching the crotch of the pants to your 1/2” above your measurement and the outer leg seam with your cut edge. 
freerose.etsy.com

 Trace or cut along the inseam and hem, adding seam allowance (1/2” on inseam, I did a 1” hem so I would have extra to lengthen the pants later.)
freerose.etsy.com
freerose.etsy.com
Step 6: Pin the 2 seams together on your garment.   (Quick sewing tip: Pinning perpendicular to your seam allows you to easily stitch right over your pins!)


freerose.etsy.com

Thread your machine and set it to a tight, smaller than average stitch to prevent the knit from unraveling, a stitch length of 2 should generally work. Sew seams together, being careful keep your knit from stretching.
freerose.etsy.com
* If you are making these as longies for cloth diapers, you can easily add a soaker layer to the front and back before stitching the inseam.  The scraps from between the legs would work perfectly.
Your raw edges will need to be finished to avoid unraveling.  I used a serger, but a medium zig-zag along the edge would work also.

freerose.etsy.com
Step 7: Now onto the last step!!  Before turning up the hem, I like to trim a small corner off of the  bottom of the hem so that there is less bulk along the seam. 

freerose.etsy.com 
 Turn up the bottom of the pants 1” (or whatever seam allowance you added in step 5) and pin

freerose.etsy.com

Stitch along the raw edge with a zip zag, which will finish the edge and hem the pants in one step, making sure to not stretch the garment as you stitch.  I also recommend using a zig-zag in this step because it is easier to remove if you even need to adjust the length of the pants, and makes it easier to keep the knit flat.

freerose.etsy.com
All that’s left is to turn your pants inside out and say “WOW! That was easy and these are adorable!!”  :) 

freerose.etsy.com
I spent an evening hoping for an action shot, but my son was so comfy in these pants he wouldn't stay still.

freerose.etsy.com

****************************************
Isn't she great!?! I love this tutorial and I intend to hit up the local Thrift store in search of a nice sweater or 2...or 3! 

Wednesday, November 3, 2010

Halloween 2010 Part 3

Happy Halloween, did you all have one? I managed to finish my costumes with 36 hours to spare! Which is a huge improvement over last year. Remember when I told you what the boys wanted to be?

That's right, a cast of characters from the old Sonic the Hedgehog game. With no pattern available I was left to my own devices (and free hand drawing/pattern making) again this year.  It was easier than I thought, but also quite time consuming. But it was a labor of love, and the excitement from the boys was worth it. Taking pictures was difficult though, as I am sure you can imagine, what with three boys aged 4, 3, and nearly 1. What do you think I will have to make next year to top this? I may have to start sewing in July!

And now for the DEBUT! Sonic, Knuckles, and the Baby as Tails!

Photobucket

I am so proud of these costumes and I think they turned out so well! Let me know what you think!

***Disclaimer: I need to point out that this blog post is also an entry into the Giveaway Blogs Spook-A-Look Halloween Photo Contest. Contest Hosted by http://www.giveawayblogs.com and http://www.uprinting.com***

Tuesday, October 19, 2010

Felt Playhouse-Castle Style

Hello! Back again, it seems harder to craft and then blog than I had anticipated. How do you find the time to get your crafting in? It seems particularly hard for me because the MR. has requested that I not do after hours crafting. (He is probably right considering I am GROUCHY if I stay up too late. Morning comes early with multiple wakings and kids.) At any rate, I am trying to do it with three kids running around all day and it isn't very effective! 

I also finished and shipped the second Bowser costume! Wow, it still took a lot of time, and I made some great hair this year so the costume was even improved a little! And then a breathed a sigh of relief and began tackling my owns kids costumes, way behind schedule. But they are coming along. 

*************

On to what you want to see! I posted a while back about a felt playhouse that was in the works. I joined a 1st birthday exchange and felt the need to make something great! (MR thinks I went overboard, but a little girls joy is SO worth it-right?)  So here are the pictures of the castle I made for a sweet little girl. The only thing I would change is I would have done the battlements differently. See how they won't stand straight? I double layered the felt and used pipe cleaners for some 'bones' in between the layers, but the stability I was looking for isn't there. Next time (if there ever is one) I would use a real strong interfacing-the kind used for hat brims- and put that in between the layers and I would not sew it onto the fort as shown here. I would put Velcro all the way around the playhouse and attach the battlements as a second piece.

Photobucket

Photobucket
The Ivy wall
Photobucket
With flowers (attached with Velcro)
Photobucket
The friendly dragon ( I copied a clip art image and had my Dad draw it to scale.)
Photobucket
Window Wall with shape matching on the bottom.
Photobucket
Crown, torches, and mail
Photobucket
Weather pieces so She can match the weather outside.
Photobucket
Notice how the 'Drawbridge" door stays connected at the bottom? I put small grommets into the door and the 'door frame' and then used a key ring to run through both layers giving the Drawbridge effect I was looking for.

So, what do you think? I got the original idea for a Felt Playhouse from Jill at Homemade by Jill.

Monday, September 27, 2010

The only kind of Brownies I will eat!

Missed me? I have missed posting and crafting myself, and I will be working on plenty soon! This summer was full of adventure, want a taste of what we were up to?
Photobucket
That is right! J and H being lowered into a lave tube that is now an ICE CAVE! I didn't actually attend this event as I would have died from sheer panic if I had had to witness this, but couldn't spend the time blogging because the car battery died and I had to drive 90 minutes one way to be the rescue party. Sounds like I got my own adventure out of it!
*****************
Upcoming projects:
3 Halloween costumes for my boys, plan found here.
A reader contacted me praising the Bowser costume I made for J last year and requested that I make another one for her 5 yr old son, I am all too happy (or crazy if you ask the MR.) to oblige. Photos of the process will be taken!
*****************
For today's post I thought I would share something I like to create that makes my tummy feel wonderful! Sheet cake Brownies! Now, I am not a Brownie person or a chocolate person in general, but these brownies get me every time. They are easy and Yummy! 

1 stick butter(1/2 cup)
1/4 cup cocoa
1/2 cup vegetable oil
1 cup water
2 cups sugar
2 cups flour
1/2 cup milk
2 eggs
1 tsp vanilla
1 tsp soda
1 tsp salt

Boil butter, cocoa, oil, and water together. After the mixture gets to a rolling boil, remove from heat and add remaining ingredients. Beat well, (I use my hand mixer) and pour into a greased floured cookie sheet. Bake at 400 for 15 to 20 minutes. Toothpick should come out clean.

When ten minutes have passed in the cooking time, make the frosting. The brownies will need to be frosted immediately. Make frosting by boiling 1/2 cup butter, 1/4 cup cocoa, 1/3 cup milk. When this has reached rolling boil, remove from heat and add 4 1/2 cups powdered sugar, 1/4 tsp vanilla, 1 cup chopped nuts(opt- we have allergies so these pics are without nuts. Beat well (I use my hand mixer here too). When the brownies come out of the oven, frost and let cool. Tastes great served warm with vanilla ice cream...or eaten the next day for Breakfast while the kids eat a more wholesome meal.